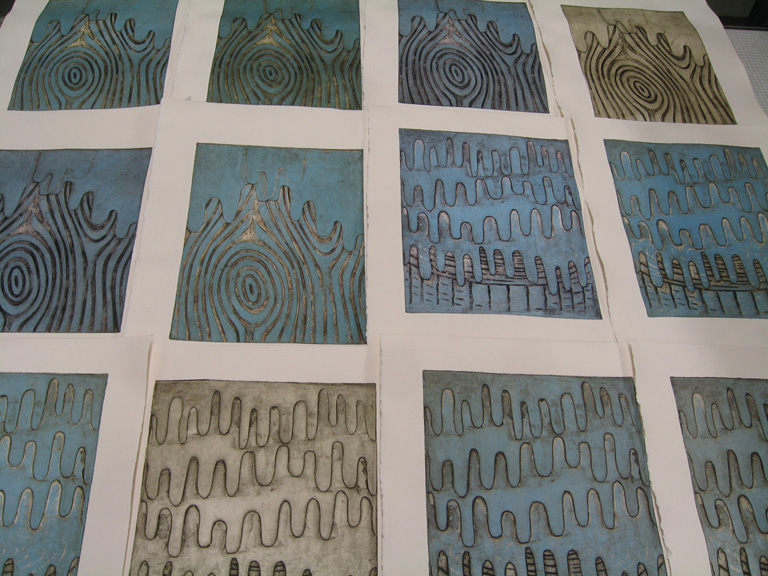
I was selected to produce an edition of 50 multiples for the Legal Art Community Supported Art project. I decided to create two collograph (or chipboard relief, whatever you’d like to call them) plates, printed in a variable edition. Knowing that this project was designed to bring a larger audience to art collecting, I thought that putting a post up showing how I made the works would be helpful. Additionally, I have written a statement designed for print novices about the work itself here.
The plate itself was made using chipboard and bristol board. I incised areas of the plate, glued paper forms on, and coated the front and back with acrylic gloss gel medium.
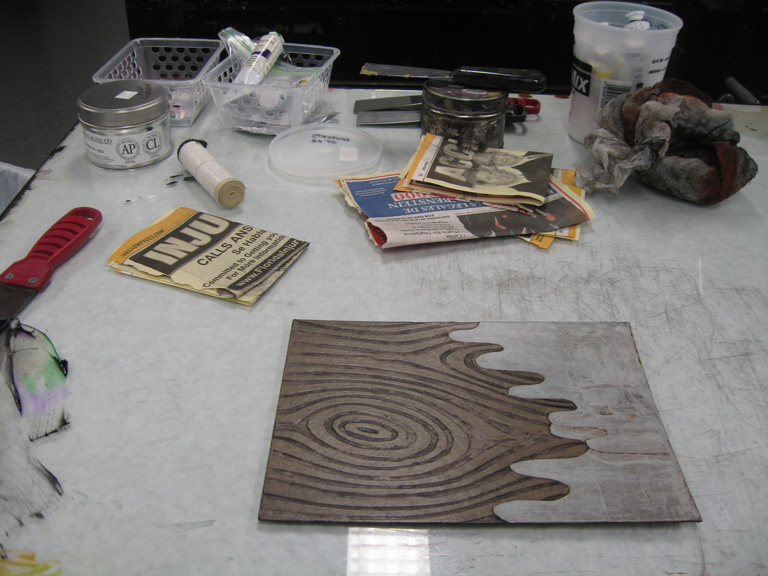
This is what my typical workspace looks like when preparing to ink an intaglio plate. A glass inking table, inks, ink knives, phonebook pages, and the plate.
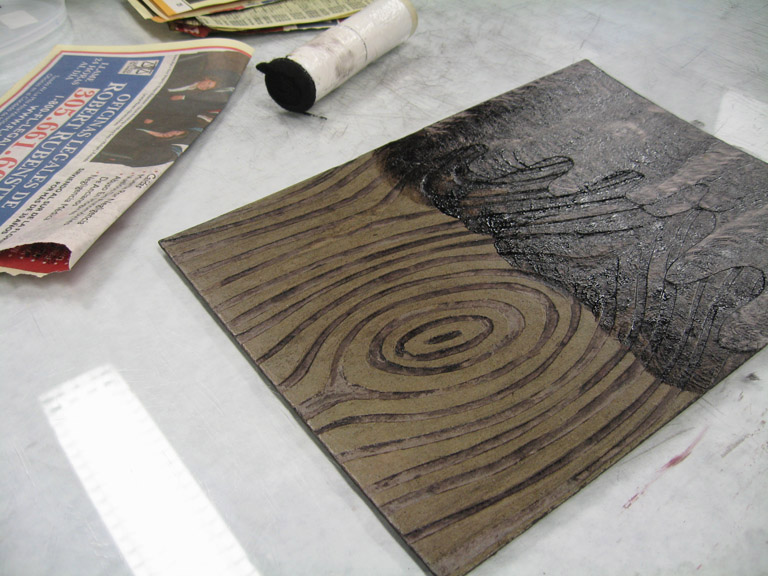
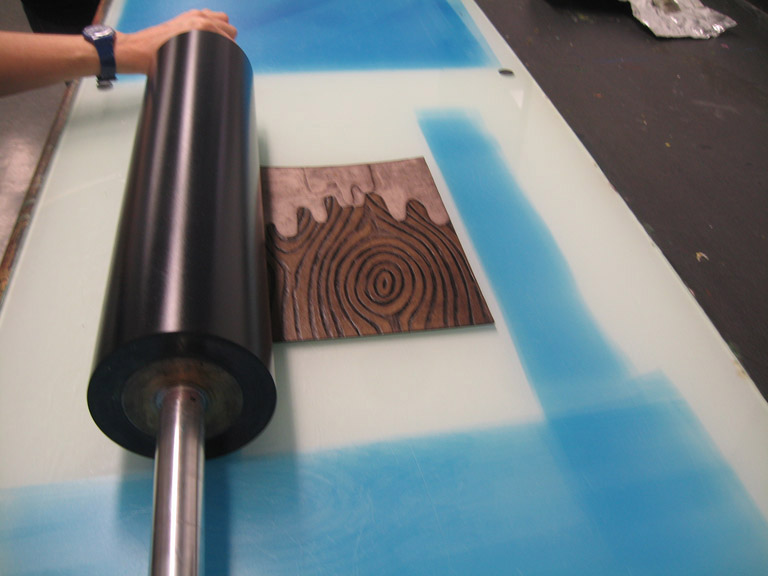
In the image above, the plate is half-inked. I used my makeshift dauber–the rolled form (made of old press blankets wrapped with white duct-tape). The purpose of this stage of inking is to force the ink into the small recesses of the plate; the ink is applied with strong downward force.
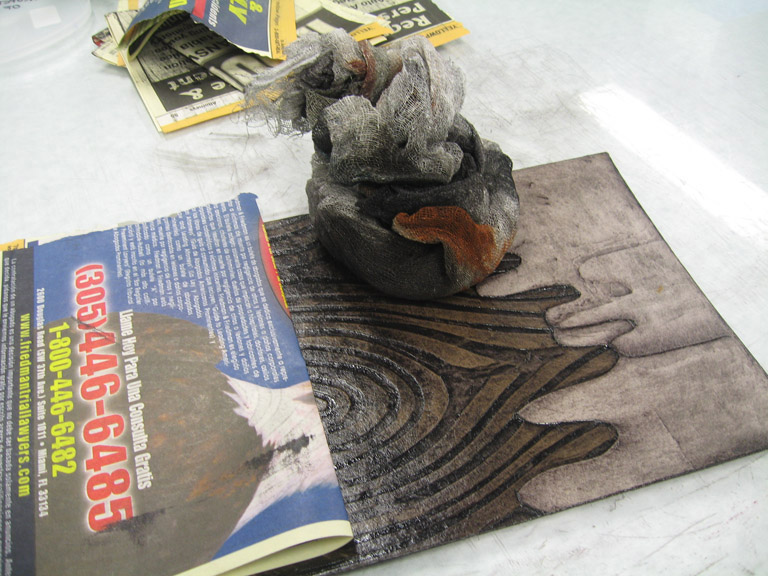
After the ink is forced into the recesses, it is then wiped off of the surfaces of the plate using tarlatan (starched cheesecloth). The oily inks still leave a beautiful residue which prints as what we call ‘plate tone’.
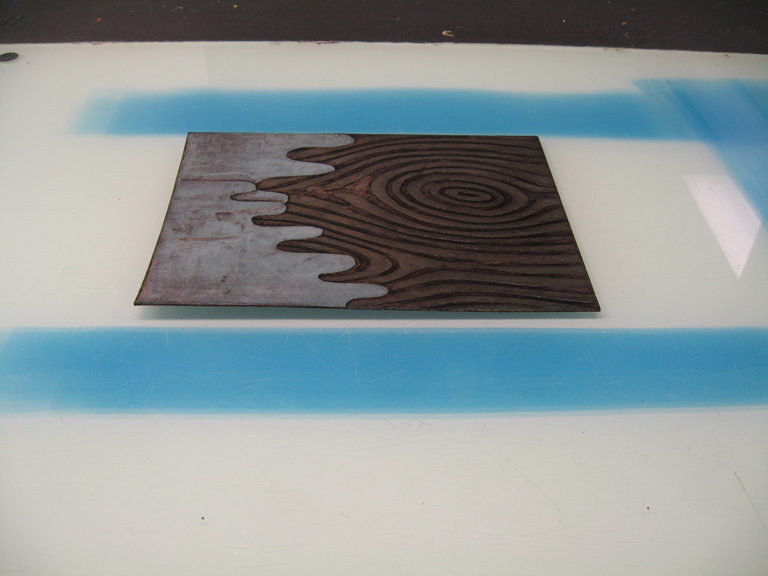
After wiping the plate, I then moved it to another inking table and rolled it with a transparent blue ink. I used medium force while rolling, which covered most of the plate, except for the recessed areas and areas directly adjacent to a higher section of the plate. I used a litho roller (I think the durometer is 30), rather than a brayer because I needed to make sure the roller didn’t lap and leave a line (roller-mark) on the plate.
You can see a slight blue sheen on the plate in the image above. Though I rolled the blue ink on top of the other, the two didn’t mix–I was sure to mix the blue ink to a lower viscosity (and higher oil content ) than the brownish ink. This meant that not only did the blue overlay the other rather than blend, but that I also didn’t have to clean the roller after every application, since it did not pick the brown ink up. I only had to roll out the ghost (where the ink had been applied to the plate) between ink applications.
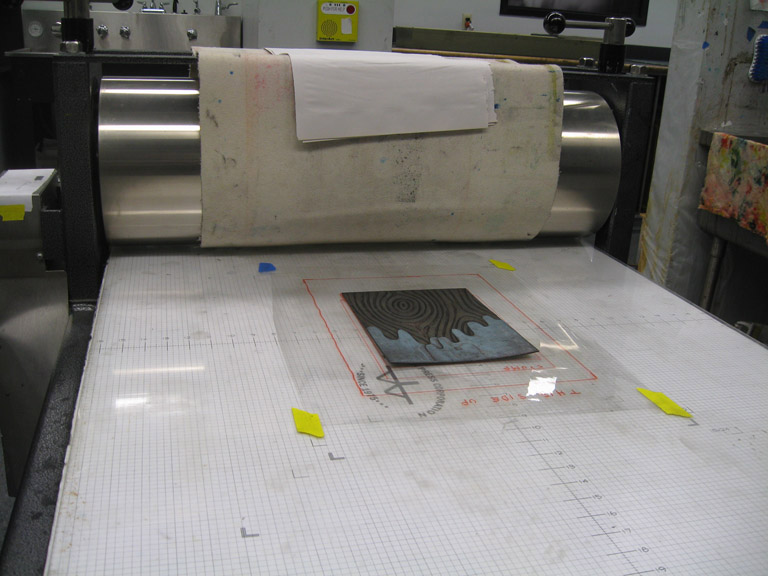
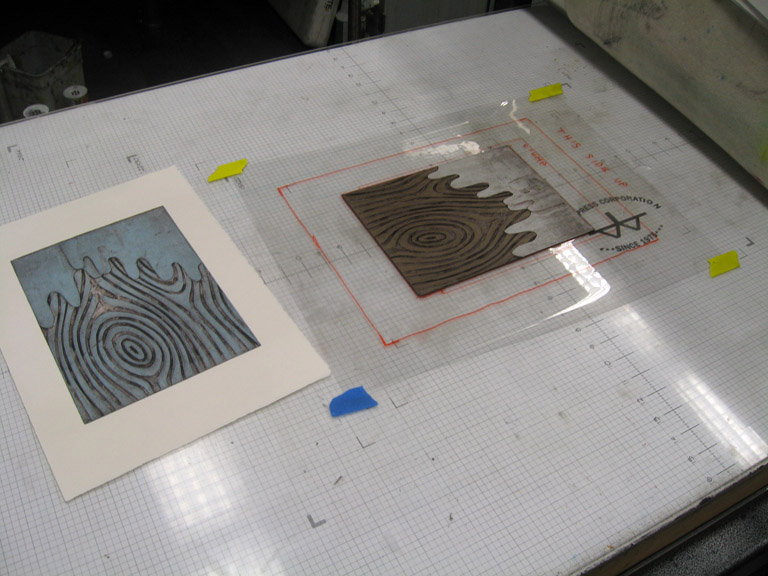
At this point, the plate is ready to be printed. I use a template to make sure that the plate and paper are in register. I usually only print with the one blanket, the pusher, though I do use newsprint to protect and add pressure. You can see that the blanket is pretty dirty. It’s mostly dry, though I will give the evil eye to my monotype class at this moment.
The paper would be laid down next. So at this point, I’d like to address the paper preparation.
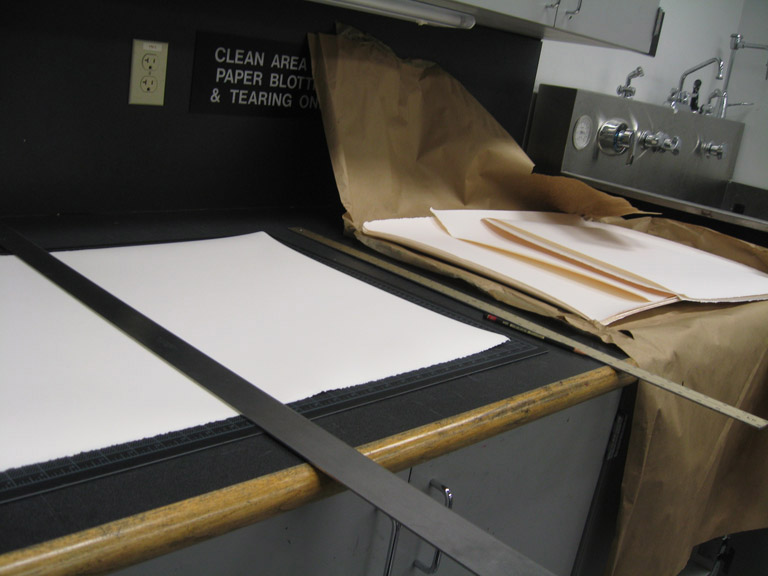
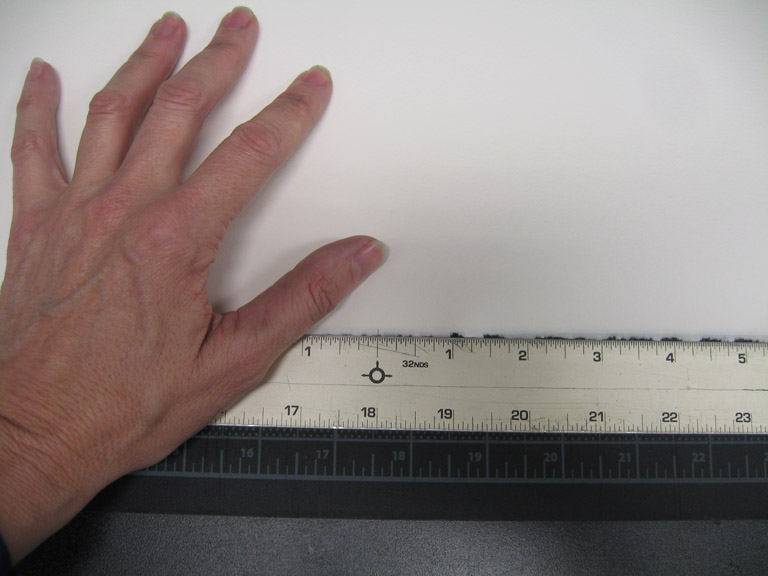
The image above shows the paper-tearing and blotting area. I used Zerkall Copperplate, which prints amazingly well and is a lovely warm buff color rather than a cold stark white. I tore the 30″ x 22″ size into half, and then those halves into half again.
My love, the center-finding rule, is shown above. I cannot live without one. We tear the paper to better mimic the deckled edge which mold-made (and hand-made) papers have. The deckle, however, makes it tricky to measure the paper, because though a paper might be sold as 30″ x 22″, in reality it is larger because of the deckle. If you were to simply count 11 inches and tear (to get half of 22), you’d likely end up with 11.25 inches on the other side. Using a center-finding rule allows for balance which includes the deckle; it doesn’t matter how much the deckle adds to a paper if you’re simply tearing the thing in half.
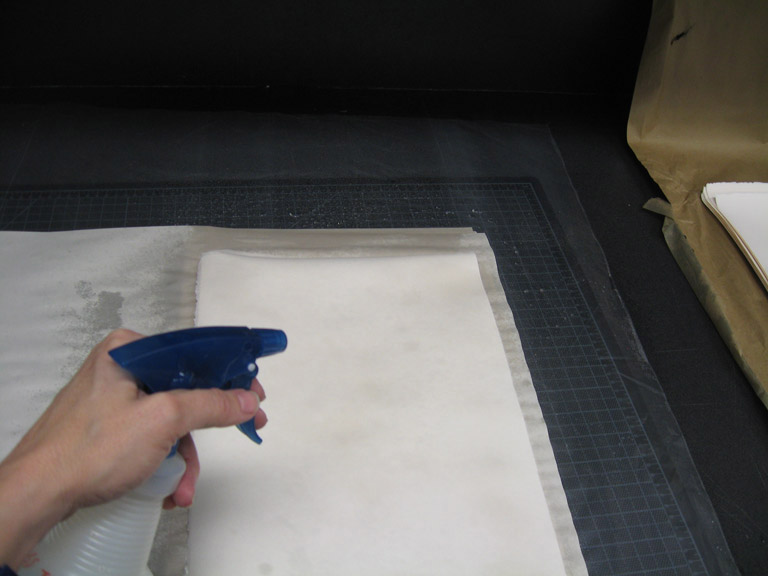
Intaglio is generally printed on damp paper, to better allow the paper fibers to be forced into the plate recesses. The usual method is to soak and blot the paper before printing. Many papers, however–of which Zerkall is one–cannot be soaked. In such a case, the paper must instead be damp-packed.
The torn-down sheets are misted with water and interleaved with an absorbent paper. I used newsprint. Fancier printers than I am might use blotters.
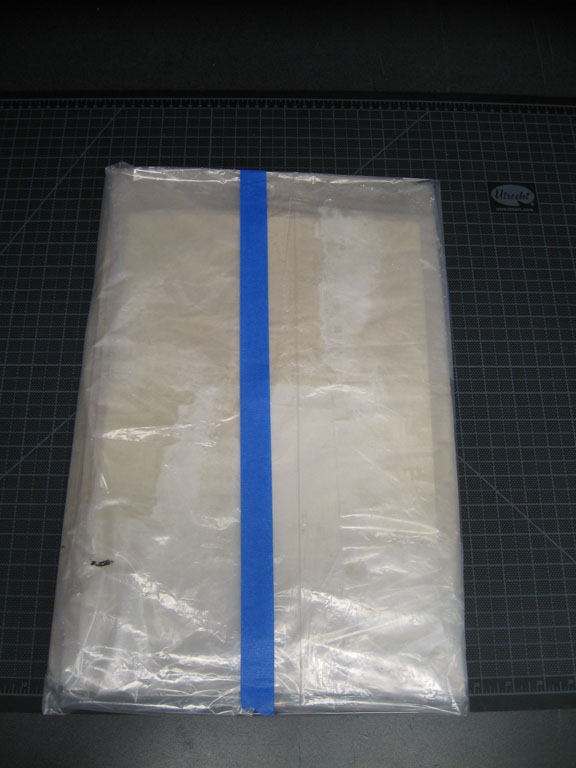
After being misted and interleaved, the whole stack is wrapped in plastic. This preparation is preferably done the night before a printing session, and cannot be left for more than a couple of days (at least here in Miami) before the paper starts to grow mildew.
At press time, the damp-pack is opened, a sheet of paper is removed and transported over to the press, then put directly on the plate in alignment with the template. No blotting necessary. Though the advance prep time is greater, I find it to be a more efficient way to print.
The print, after immediately pulling the impression. You can see that the majority of ink was removed from the plate. I printed this at a fairly high pressure (zero on the stem, four on the micrometer gauge), though I did back it with many sheets of newsprint as well (partly because my paper was still rather wet, instead of merely slightly damp–I didn’t want to get the blanket wet).
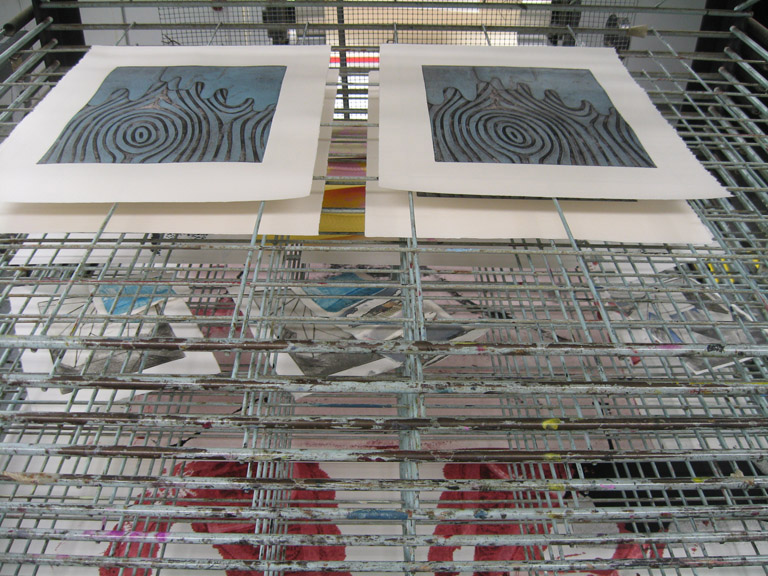
Four finished impressions drying in the rack. I usually pin prints so that they dry flat–Zerkall does tend to get a little bumpy–but for an edition of 50, that would have added a lot of production time, as well as pin-holes to the outside edge of the paper.
Once dry, the bad impressions are weeded out, the prints are ordered, then titled and signed. Since this was a variable edition, I alternated the impressions depending on the matrix–all the odd-numbers come from the Knothole plate (the one in this post) and the evens come from the Stump plate.
If you’re interested in more of a discussion about variable editions, or a general overview of my ideas about hand-pulled prints, be sure to read the PDF statement linked at the top of this post which I prepared specifically for this project.
